PSD Vault is my spare time hobby and I write majority of the Photoshop tutorials and articles here. No other updates were made to the filter. Increasing Cleanliness to its maximum value.
You can adjust the following settings for the filter: Adjusts the style of the strokes, ranging from a daubed look at 0 to smooth strokes at 10, Adjusts the length of the strokes, ranging from shortest & choppiest at 0 to longest & fluid at 10, Adjusts the relief or apparent thickness of the paint, moving from a thin coat at 0 to a thick coat, giving luscious Vincent van Gogh-style paint globs, at 10, Adjusts how much of the paintbrush-hair indentation is apparent, moving from soft at 0 to leaving strong grooves at 10. And, since bigger brushes tend to use more paint, the higher Scale value creates what looks like thicker globs of paint on the canvas as opposed to the thin layer we saw previously: I like the look of the larger brushes for this image so I'll keep my Scale value fairly high, lowering it from 10 down to 7: The fourth Brush option is Bristle Detail. Professional tricks and how-to's that we've made are easy to learn. Here are a few quick comparisons so you can see what the effects are and decide if you like them. It was also difficult to see exactly what you were getting in the preview window. If you have been using Photoshop for some year, you will know the Oil Paint filter is a wonderful filter that can transform any photo into an artistic oil painting. The third option, Scale, controls the size or thickness of the brush itself. Tip: Ive found I usually need to increase contrast with a levels adjustment after I run the Oil Paint Filter. The main benefit of Smart Filters is that they remain fully editable. I love Topaz and its great to have help with that, too. Please do more than just listen, PLEASE bring it back thank you. Once you click on Oil Paint, the following window should appear. Increasing Stylization to its maximum value. The effect with Bristle Detail set to 10. Leslie, Lowering the Cleanliness value to 7 shortened the brush strokes, bringing back detail.
You can also see Sketch Photoshop Actions. which one of the single packs of Topaz have you used here?
If you're fond of oil paintings and wouldn't mind opening a private gallery in your toolbox, then this Photoshop effect is for you! Now this is my idea I didnt get it from anyone, so if your computer blows up, its all my fault, lol. The best way to try it out is to chose a high-resolution image with a good amount of detail. Check out our Photo Effects section for more Photoshop effects tutorials! I love how the Oil Paint filter enhances details especially on plants and animal fur in a soft, undulating way. This forces us to view them at something less than the 100% zoom level, which means we're not seeing all of the pixels in the image, and that means we're not seeing a truly accurate representation of what the image looks like. Grab it and convert your pictures into a masterpiece. As follower of the group you will receive email notifications of events in the group. At the lowest setting, there's very little in the way of bristle detail: Yet if I increase the option to its maximum value of 10: The grooves become much stronger and more obvious: I'll split the difference and set my Bristle Detail value to 5: Here's what my oil painting effect looks like so far after setting all four Brush options: Below the Brush options are the Lighting options.
Short brush strokes give the painting more texture and detail, while long strokes give it a less detailed, cleaner look. Just would like to buy one single pack, not the whole suite Heres the image that I will be using feel free to use the same as you follow along the tutorial. Were Pixelbuddha and we're passionate about creating free & premium resources for the professional community.
To do that, click on the small menu icon in the upper right corner of the Layers panel: Then choose Convert to Smart Object from the menu that appears: It won't look like anything has happened to the image, but if we look again in the Layers panel, we now see a small Smart Object icon in the lower right corner of the layer's preview thumbnail. I dont much care for the pebbly effect, but I can see how some might like it.
Yet without the shadow and highlight detail from the brush strokes, we get a much cleaner looking effect. Great info, Leslie, Ill try pixel bender with your Topaz Creative Detail Accent. When you move your mouse cursor over the image, you'll see the cursor change into a little square which represents the boundaries of the preview window. I really do love these filters. The Oil Paint filter lets you transform a photo into an image with the visual appearance of a classic oil painting.
It's always best to work non-destructively in Photoshop, so let's apply the Oil Paint filter as a Smart Filter. Required fields are marked *. Dragging the Scale slider all the way to the right. You don't need to crank it too high. American Photographer and Designer living in France with my French husband, 2 Weimaraners and Cat Rescues. Photoshop has made some changes to the Oil Paint effects that I dont much care for though. by Leslie Nicole | Jun 1, 2012 | Photoshop | 11 comments.
Note: If the Oil Paint filter is disabled, check if your computer supports OpenCL v1.1 or higher. Adjusts the incidence angle of the light (not the brushstroke). Stylization & Cleanliness 10, Shine 0, No Topaz Filter. Go ahead, get hold of it and put this amazing Photoshop action to use without delay. When I upgraded to Adobe Photoshop CS6 over the weekend, I was thrilled to find that the Oil Paint filter is now a part of Photoshop! Depending on the image, a much lower Cleanliness setting may be desirable. I will say, I have ultimately taken the image into Corel Painter 11 and touched up some stray odd spots but on the whole it has been successful. This effect works nicely with just about any image. Post questions and get answers from experts. And even though it's essentially the same filter that it was back in CS6 (which isn't a bad thing), the CC version now sports a much smaller, less intimidating dialog box that makes using it seem easier than ever. I'll drag my Cleanliness slider all the way to the left, to its lowest value (0): This gives me the shortest possible brush strokes: If I drag the Cleanliness slider all the way to the right to its maximum value of 10: I get long, fluid strokes, resulting in a much cleaner, less detailed effect: For this image, I think long, fluid strokes work better, but at the maximum Cleanliness value, they're too long. We'll come back to the Lighting options later: The first brush option is Stylization. All rights reserved. Download Now Get hold of our Creative Oil Paint Photoshop Design Action and then just a single click would let you add amazing oil painting effects to your photographs almost effortlessly. I absolutely love your final image Im mad for poppies for all the beauty that youve captured so well!!!! Every design is an experiment, and every product is a success it's our motto for paper textures set, thats both beautiful and essential for all kinds of products, especially as ink marble.
We publish tutorials and articles intended to improve your professional skills and help you not to miss anything important from the design industry. Quick update: Im finding that if I have Shine turned off, I can play with the Cleanliness setting to modify just how soft and swirly the effect is. Though they are simple, they're meant to be something special, something unique for everyone who looks at them.
In operation since 2009, PSD Vault focuses on providing high quality, step-by-step Photoshop tutorials to all Photoshop lovers and hobbyists around the world. In my case, the image itself has a light source that seems to be coming from the upper left, so I'll rotate the angle to match it as closely as I can.
Im now using the filter on a new, fast iMac so I cant compare the processing needs exactly, but overall, it just seems more responsive and the preview is great. The Layers panel showing the photo on the Background layer. Free Photoshop Tutorials that are Awesome. If we look in the Layers panel, we see our image sitting on the Background layer: To apply the Oil Paint filter as a Smart Filter, we need to apply it not to a normal layer but to a Smart Object, which means we'll first need to convert our Background layer into a Smart Object. Clicking and dragging inside the circle to change the Angle value. Once youve done that, the program works like a dream. Dragging the Bristle Detail slider all the way to the left. Selecting the "Convert to Smart Object" command. Aside from all of the new advanced features of Photoshop CS6, there are also a few smaller ones which are special in their own way like Oil Paint Filter.
Become a Pixelbuddha Plus to get access to extra content of premium quality. Do you want to have your graphics look a pictureliterally? Small yet incredibly useful set of 3 vector wood textures at your service! Reviews, recommendations and articles on graphic design. This allowed us to apply the filter as a Smart Filter. If you need to make further changes to any of the filter's settings, simply double-click directly on the name "Oil Paint". Stylization and Cleanliness at 10, Shine 1, If I put the Shine setting to 0, it takes out the pattern, but leaves some of the desired painterly feeling to the image. Higher Shine values produce more intense lighting. Copyright @ 2009 - 2022 | PSD Vault.
Now, I'll be the first to admit that I'm not a painter. Some jaw-dropping offers are coming this year! Here's the image I'll be using. The effect with the brush strokes visible. Play around with these until the result looks just the way you want it to. 
Ive chosen this simple poppy photograph to demonstrate the changes and give you my own secret sauce for using the oil paint filter in combination with aTopaz Labs* filter to get the effect that I want. Become a modern Michelangelo or Rembrandt and amuse your audience!
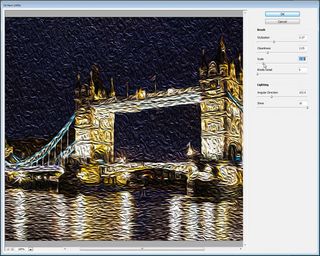
I know sounds like Im talking treason, doesnt it but it seems to work just fine. I downloaded it from Adobe Stock: And here's how it will look after applying the Oil Paint filter: This tutorial is from our Photo Effects series. That's how to use the Brush and Lighting options in the Oil Paint filter to easily turn any photo into an oil painting with Photoshop CC! At lower values, the grooves appear light and soft, becoming stronger and more pronounced as you increase the value. Image with the Photoshop CS6 Oil Paint and Topaz Labs filter, ThePixel Bender filter is a free filter that works with Adobe Photoshop CS5. cs6 photoshop introduction styles paragraph character using The interface was finicky and the hardware processing needs were so demanding that I had a very difficult time running it on my 4 year old iMac (Ive since upgraded my Mac. Lets take a look at one of the feature which falls into the exact same category Oil Paint. Of the many tutorials (written or videographed) for this filter, this was one of the few that had some meaningful information and a carefully chosen demo picture. Depending on your design, you just play with the series of these actions. Download Now Free Download Oil Painting Photoshop Actions is yet another range of Photoshop actions that have been piled up by us on our website. Although its still not directly under the Filter menu, you can now find it under Filter > Stylize > Oil Paint: I guess after all, the Oil Paint filter is just too good of a filter to remove completely. But thanks to Photoshop and its Oil Paint filter, I don't have to be! At the very top, we have a preview window, and below it are various options for controlling the oil painting effect, all of which we'll look at in a moment: Even though Photoshop gives us a live preview of the oil painting effect within the image itself, most images these days are too big to fit entirely on the screen at their actual size. The Layers panel showing the Smart Object icon. Go up to the Filter menu in the Menu Bar along the top of the screen, choose Stylize, and then choose Oil Paint: This opens the Oil Paint filter dialog box. Fortunately, the preview window at the top of the Oil Paint filter's dialog box gives us an easy way to view and inspect different areas of the image at that all-important 100% zoom level. A flow of inspiration from your favorite creators. The resource is available after subscribing to our mailing list. The same oil painting after moving the light source to the upper left. The effect after toning down the Scale value. Meet the textures, that are as multifaced, as the Rorschach test is. And a quick comparison between the different shine levels you can set from the Lighting options of the filter: The Oil Paint filters feature is a creative and original idea for image editing, and its a fresh idea to keep in your Photoshop arsenal. I hope you enjoy my blog, and feel free to leave a comment or contact me if you have any questions. These is one of the nice pic editor. This lets us know that the layer has successfully been converted into a Smart Object: With our layer now converted to a Smart Object, we're ready to apply the Oil Paint filter. Theyve made a few changes to the settings that I both like and dont like. Discover the brand-new subscription plan and a special discount for all Plus subscribers. its financially important to me and many hundreds of thousand others. Since the Oil Paint filter was only recently added back to Photoshop CC, you'll want to make sure that your copy is up to date before you continue, otherwise the filter may not be available. I now blog on my store site and this blog will be transferred over. For more information, see the GPU FAQ. This does not hide the entire effect created by the Oil Paint filter.
Opt in and start your download immidietly. Try each extreme of the Cleanliness filter to see which direction works best for your image. At a more mid-range Stylization value, the strokes have a nice blend of smoothness and detail: The second brush option is Cleanliness. I use it every day without exaggeration. Backblaze is the solution I use and recommend. Endow your present photographs and images a high-quality creative lead with our beyond belief range of Oil Paint Photoshop Actions.
That way, we'll be able to easily go back and try different settings until we get the effect looking just right. As much as I loved the filter, it had a few problems. The other is as a Smart Filter which keeps the filter settings non-destructive and fully editable. Thanks for supporting the site. Here's Chrome does an excellent job of storing your browsing history, cache, and cookies to optimize your browser performance online. Thanks so much for this clear tutorial. It controls the strength of the grooves created in the paint by the hairs in the brush. The first difference I noticed is in the Stylization setting. In most cases, you'll want to make sure it's selected (checked) so you're seeing the live image preview, but if, at any time, you want to see your original image again for comparison, simply uncheck the Preview option. Dragging the Scale slider all the way to the left. We bring free and premium design resources of the highest quality to the professional community. The effect using the highest Stylization value. We'll start by looking at the Brush options. One is as a static filter, which means we'll be making permanent changes to the pixels in the image. I get a small commission from any sales resulting from a click from this site (at no extra cost to you.)
Doesnt sound a lot these days, does it! In looking at the Adobe Blog, there is a plug-in that may do the trick called Pixel Bender Accelerator for Photoshop. Your email address will not be published. Copyright 2007-2021 groovyPost LLC | All Rights Reserved. I usually use Topaz Labs Detail 2* with the Creative Detail Accent preset. You can use the plus and minus icons on either side of the zoom level to change it, but in general, you'll want to leave it at 100% for the most accurate view: Finally, the Preview option to the right of the window controls whether or not we see a live preview of the oil painting effect within the image itself (as opposed to just inside the preview window in the dialog box). Selecting a region changes the language and/or content on Adobe.com. If thats the case, check the following: You can send layer to bottom of stack by using the following shortcut: Remove Text from Image in Just Seconds using Photoshop Content Aware Fill. Unlike some other options like Liquify, the Oil Paint one doesnt have its dedicated keyboard shortcut. Dragging the Bristle Detail slider all the way to the right. I'll lower Bristle Detail down to its minimum setting (0): To make it easier to see the effect, I'll zoom in to 200%. Cleanliness tends to mellow out the contrast and intensity of stylization. Get all of our Photoshop tutorials as PDFs. Create Colourful Fiery Portrait in Photoshop, Design Unique Text Effect using Liquify Filter in Photoshop, Create Epic Deep Space Photo Effect in Photoshop, How to Create Magnificent Evening Landscape in Photoshop, How to Create Epic Battlefield Scene in Photoshop, Create Rusted Metal Text Effect Inspired by Mad Max Movie, Design Magical Fire Energy Text Effect in Photoshop, Create Ocean Monster Surreal Digital Art in Photoshop, Lets Learn Photoshop Basics Vol. The preview window now shows the area where I clicked. Download this tutorial as a print-ready PDF! Simply click on the spot you want to inspect. My name is James and I have been using Photoshop since version 5.0 (long time ago!). 21+ Oil Paint Photoshop Actions - Free & premium Photoshop Vector PNG formats, Oil Paint Filter Photoshop Cs6 Download Windows 10, Oil Paint Filter Photoshop Cs6 Download Software, Oil Paint Filter Photoshop Cs6 Free Download, Oil Paint Filter Photoshop Cc 2015 Download. Something around 135 should work: For comparison, here's how the painting initially looked before changing the lighting angle, back when the light was coming from the lower right. Enjoy these archived posts, but be sure to also get newer and future posts on the French Kiss Store & Blog, Designed by Elegant Themes | Powered by WordPress, Combining Textures And Filters In Photoshop For A Painterly Look, http://fineartamerica.com/featured/on-golden-pond-lois-bryan.html, Using Photoshop Grunge Brushes In Layer Masks To Distress. Notice also that since thinner brushes tend to use less paint, we see a thin coast of paint on the canvas: If I drag the slider to the opposite end, increasing Scale to its maximum value (10): Now, the brush strokes are much thicker as if a bigger brush was used. SelectFilter > Stylize > Oil Paint to use the filter. To get the look of the Pixel Bender Oil Paint that I liked, I jack the Stylization and Cleanliness effects up all the way and completely turn off Shine. I'll set mine to around 2.0 for now. Thanks. Again, this is just to make it easier for us to learn how the Brush options work. grayed
These Photoshop actions could be made use of with great ease. The final result may take a while to render depending on the quality and resolution of the image, but it usually doesnt take more than a few seconds. When youre finished with the filter, go back to image size and put the percentage to 200%. Download Now Add depth and feel to your photography by editing the same with our Big Oil Painting Photoshop Design Actions. To get to it, click the Filter menu and chose Oil Paint. Dragging the Stylization slider to its lowest setting. But for whatever reason, it disappeared in the initial release of Photoshop CC. The Oil Paint filter is back in Photoshop CC! document.getElementById( "ak_js_1" ).setAttribute( "value", ( new Date() ).getTime() ); Save my name and email and send me emails as new comments are made to this post. For comparison, here's the effect with the lighting turned on: And here's what it looks like with the lighting turned off. To change it, simply click and drag inside the circle to rotate the dial.
Thankfully, as of the November 2015 Creative Cloud updates, the Oil Paint filter is back! I usually added a Topaz Labs* filter to up the detail and contrast. Use low Scale values for thin, fine brushes or higher values for bigger, thicker brushes. 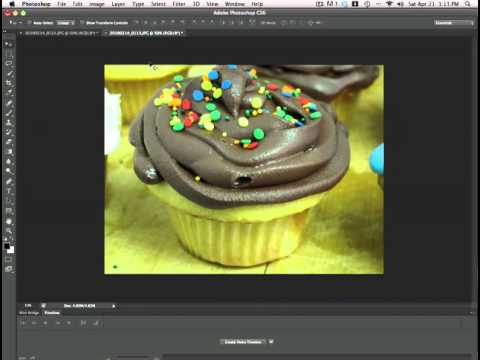 I'd like to bring back a bit more detail so I'll lower the value to around 7. By the way, heres a tip to anyone having trouble with Pixel Bender. cs6 It still looks like a painting because much of the detail from the original image has been smoothed over. The new Oil Paint filter dialog box in Photoshop CC. The filter has several effects, but honestly, besides the Oil Paint filter, I didnt see much use for the others. This filter was so unique that it stood out on his own. You can play with the settings or the opacity of the layer to get the effect you want. Here, I'm clicking on one of the yellow flowers: The spot you clicked on is what you'll see in the preview window: If you look directly below the preview window, you'll see the current zoom level, set to 100% by default. And don't forget, all of our Photoshop tutorials are ready for download as PDFs! freepsdvn No spam, no flood, unsubscribe anytime , The resource is avaialble after subscribing to our mailing list. (The effect is easier to see in the images following this one.). Camera, Mac, studio, garden. Again, a different value may work better for your image: Here's what the result looks like.
Then you can apply the effect by clicking OK. Leslie Nicole recently posted..Using Photoshop Grunge Brushes In Layer Masks To Distress. What do you think? Thanks for this timely help! Backing up your data to the cloud via an automated service is critical.
Download Now Turn your picture into a piece of art by bringing our Beautiful Oil Free Photoshop Action Download into play. Turning the lighting off flattens the image, giving you a very clean, soft and smooth result. Needless to say, that armed with our photo effect, carrying out the oil painting is just a matter of five minutes with, : choose the graphics, place it in the special Smart Layer, hit. Each illustration is hand drawn and offered as a vector EPS and hi-res PNG. Home > Photo Effects > How To Use The Oil Paint Filter. I can still pretend I'm the next Vincent van Gogh without a shred of real-world evidence to support it. In Pixel Bender, it controlled how swirly the effect was. Setting Shine to its lowest value of 0 essentially turns the light source off, giving the effect a very flat look, while cranking it all the way to its maximum value of 10 usually creates shadows and highlights that are much too strong. Download Now If you want to grab an oil paint Photoshop action that would let you add both oil paint as well as a watercolor effect to your photographs then our Oil Watercolor Paint Photoshop Actions would do the job for you. Make sure Lighting is checked, then increase Shine to make the brush strokes more visible. Why would you not want to see the brush strokes? Perfect for backgrounds and letter textures. Thankfully, Adobe later on restored the Oil Paint filter in Photoshop CC, probably based on community feedback. The effect after scaling back the Shine value. Download Now Make your photograph look even more appealing as well as striking by adding mesmerizing oil painting effects to the same by making use of our Oil Painting Photoshop Action Template. BUT. To turn the lighting off, simply uncheck the main Lighting option. On February 19th, 1990, Photoshop 1.0 was released by Adobe Systems. That should be resolved soon and then Ill be up and running, thanks to this tutorial.
I'll go with a value of 4. Weekly updates bringing the best design resources to boost up your workflow. First, we have the Brush options (Stylization, Cleanliness, Scale, and Bristle Detail) which we use to adjust various aspects of the brush strokes. Show us your results on the Facebook page and compare notes. Legal Notices | Online Privacy Policy. Download Now OurPopular Oil Paint Photoshop Action would let you add exceptionally stunning oil paint effect to your pictures and that too without letting you across any difficulty in any way. Ive been playing around with it this week and here are my initial impressions. Your email address will not be published. Let's get started! But before we do, for the purpose of this tutorial, make sure the Lighting option is turned on (checked). This blog is no longer active.